If you've read the last two lessons, you already know how to spot a swing high and swing low, and you know the one-candle EMA 200 setup. Here's the honest truth: neither of those means anything without what I'm about to explain.
Most traders jump straight to entries. They see a candle pattern, they take the trade, and they wonder later why it didn't work — even though the setup looked textbook-perfect. The missing piece almost every single time is that they never asked whether they should have been looking at that setup at all. That's what bias, context, and narrative solve.
Bias: Where Is the Price Actually Supposed to Go?
Bias is simple to define but easy to skip: it's the next point of interest the price is drawing toward — the direction the market is supposed to move before you even open a chart on your entry timeframe.
The Objective EMA 200 Polarity Rule
That's it. No opinions, no gut feeling, no “but it looks like it might reverse.” The EMA tells you which side of the market you're allowed to be on.
There are more advanced ways to read bias using SMC or CRT, which I'll get into in those courses. But for Price Action, this is genuinely enough to change how you trade permanently.
Context: Mapping Where Bias Actually Applies
Once you know the bias, the next step is context — literally shading the chart. Every zone where price stays above EMA 200, mark it in one color (e.g. green). Every zone where it stays below, mark it in another (e.g. red). That shaded zone is your context area.
The Law Undisciplined Traders Break:
Inside a context area, you only look for entries that match that zone's bias. If you're inside a green (buy) zone, sell setups simply do not exist for you — even if one forms perfectly in front of your eyes. You skip it. Full stop.
No mentor is going to tell you this directly, but it's one of the biggest reasons traders bleed out on setups that look fine in isolation but fight the bigger picture.
Narrative: Your Actual Entry Trigger
Bias tells you the direction. Context tells you where that direction is valid. Narrative is the specific rule you'll use, on your lower timeframe, to actually click the button.
The 3-Step Execution Pipeline in Practice:
The 5-Candle Setup: Two Entry Models (E1 & E2)
This is the follow-up to the one-candle setup from Part 1 — same core philosophy, different confirmation mechanics.
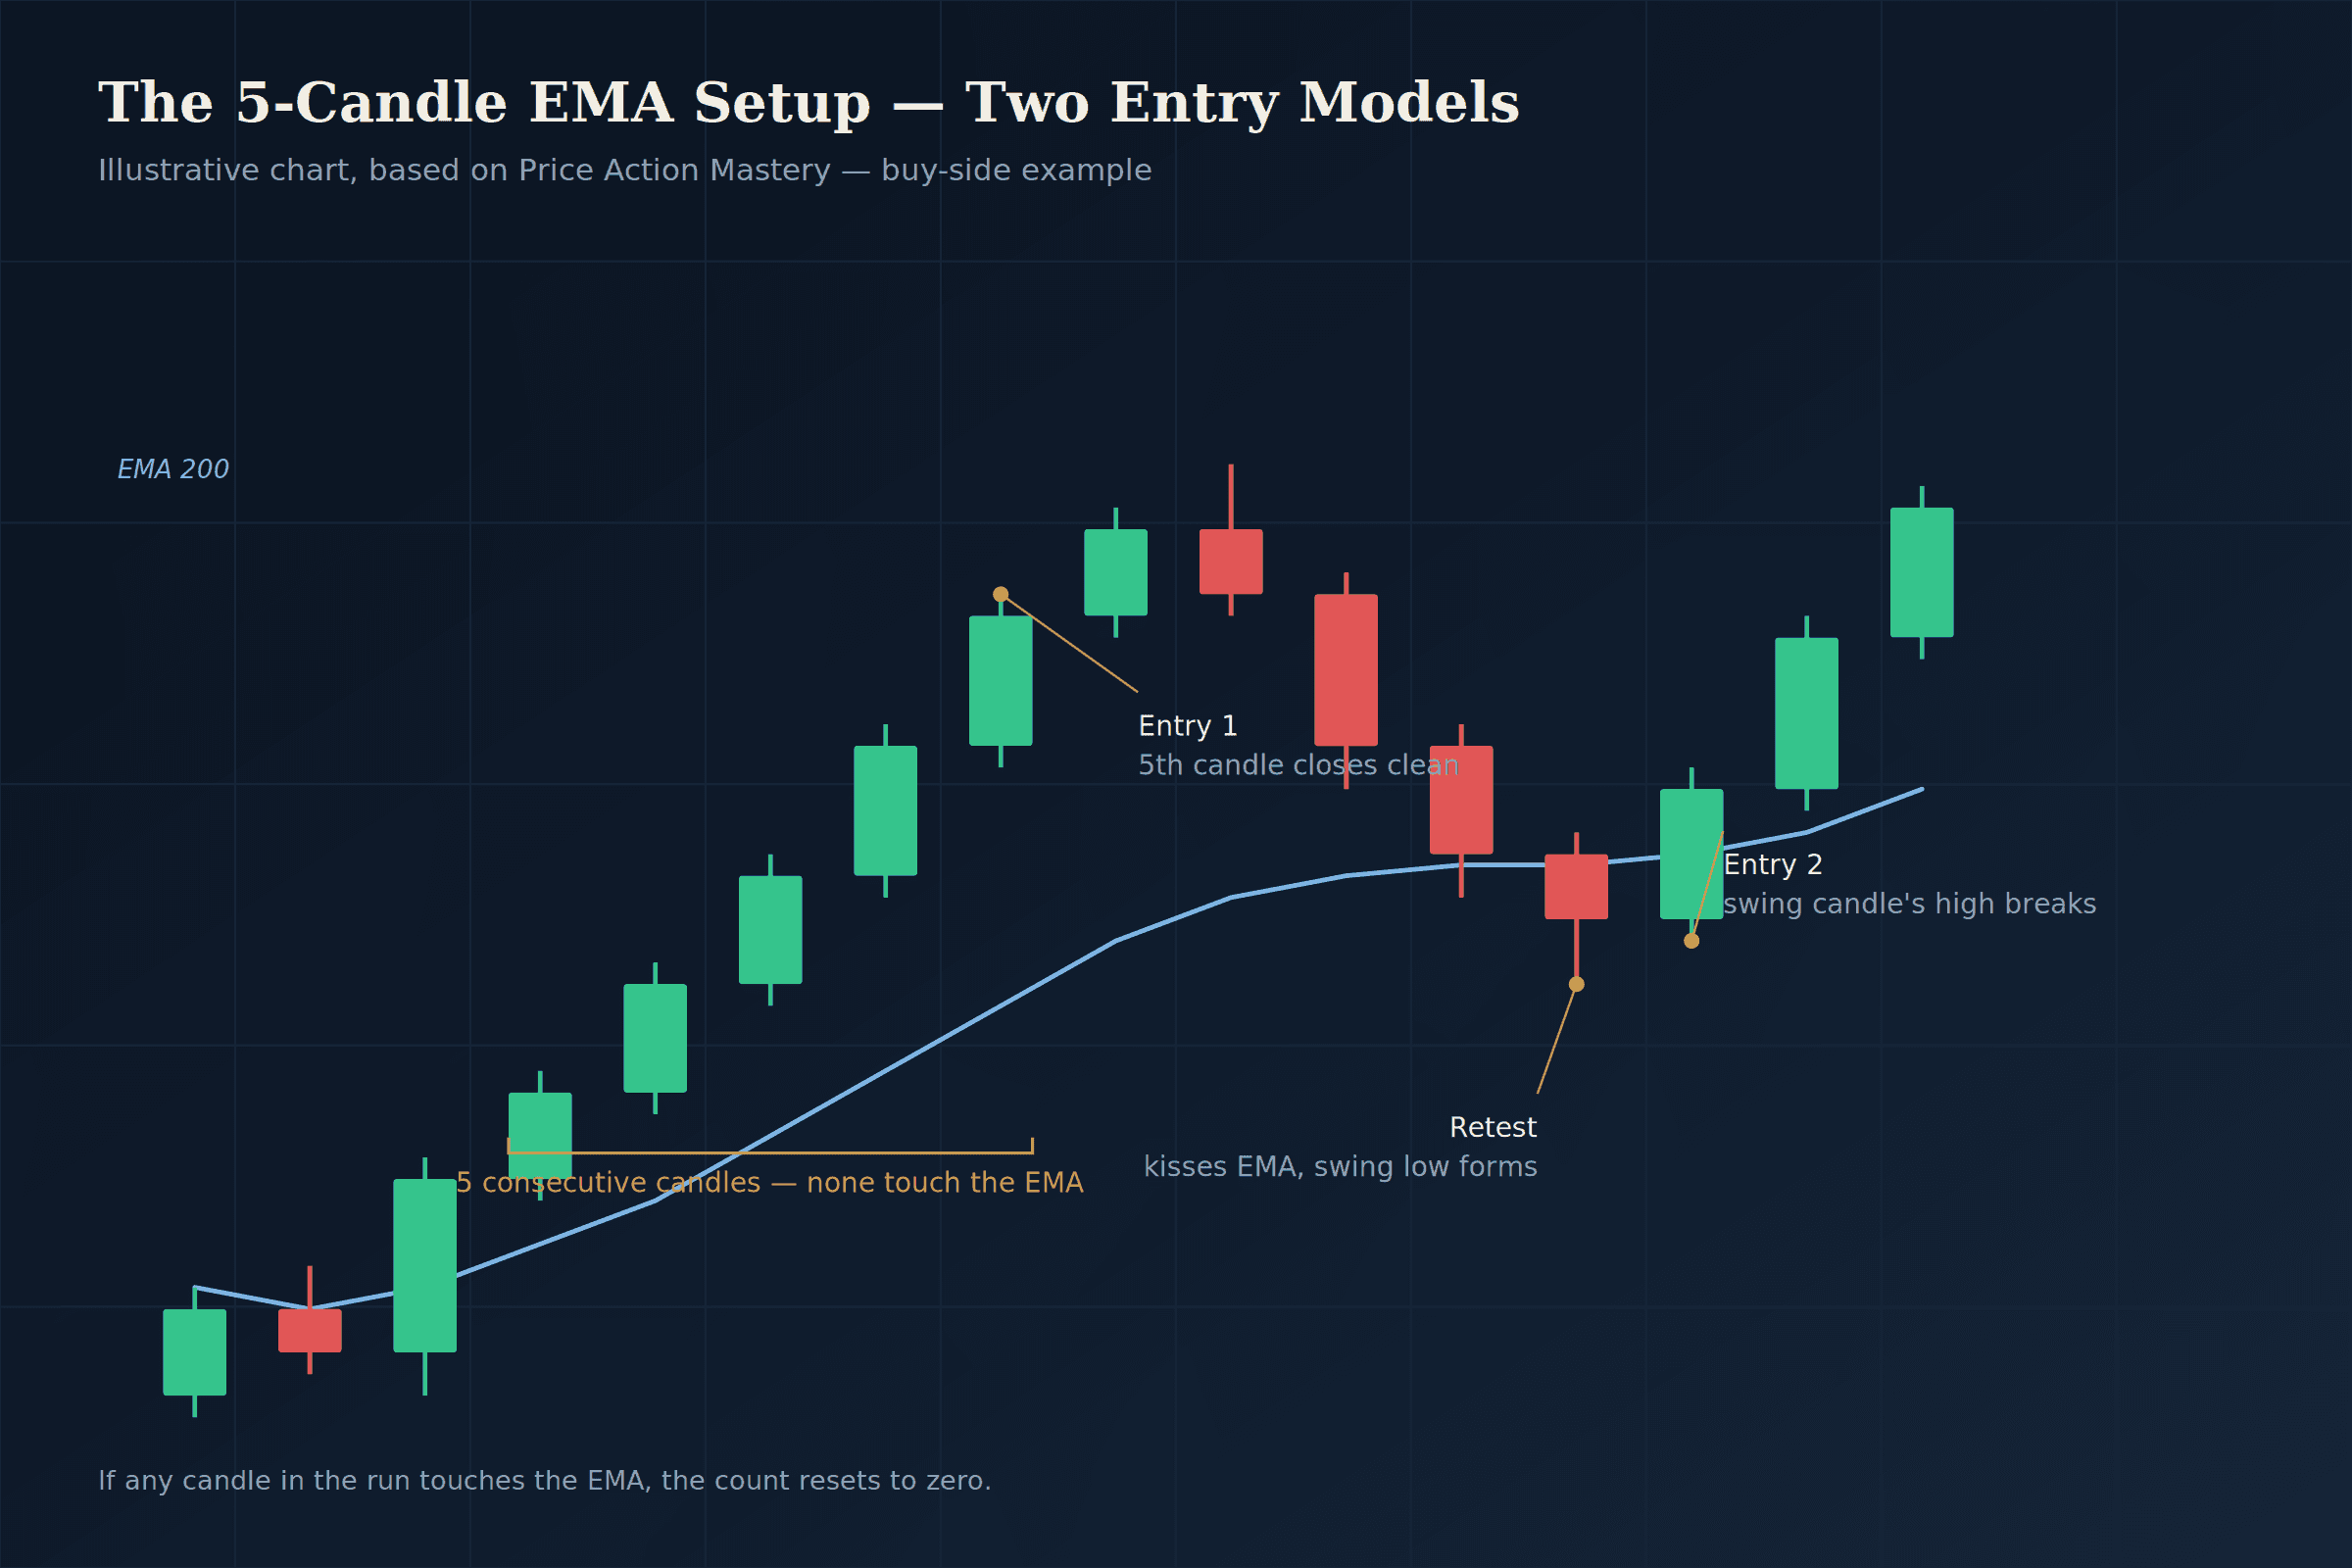
Wait for 5 consecutive candles to close on one side of the EMA without a single one touching the EMA anywhere along the way.
- If any candle touches, the count resets to zero.
- Entry occurs the exact moment candle 5 closes clean.
- SL below recent swing low (buys) or swing high (sells).
When price runs hard after the 5-candle close, wait for price to pull back and “kiss” the EMA again, forming a proper swing point.
- Enter once the swing point's confirming candle breaks.
- Tighter stop loss with high 1:3 to 1:4+ Reward-to-Risk.
- Enters closer to reaction point instead of chasing.
I want to be clear about something here: E2 setups are genuinely strong, but don't treat E1 as a lesser option just because it sometimes gives smaller gains. Take what the market gives you. Some of the best trades I've backtested came purely from E1 without ever getting a retest.
Chart Analysis: Bias & Context Zones in Action
Inspect the masterclass breakdown below to see how shading context zones and validating 5-candle sequences filters out false moves:
When to Cut a Trade Manually
Here's a piece most retail education never touches: you don't always need to wait for your stop loss to get hit to know a trade is over.
If your narrative breaks — say price closes 5 candles back on the other side of the EMA after you entered — the foundational reason you took the trade no longer exists. At that point, you close it manually, even if it is currently sitting in floating profit or floating loss.
This isn't about fear or impatience. It's about respecting the fact that your entire trade was built on a specific condition, and once that condition is gone, holding the position is just gambling on hope.
One Practical Warning: The Monday Open Trap
Strict Rule: Do not trade the first hour after the market opens on Monday (New York time, midnight). The price action in that window is notoriously unreliable — thin liquidity, unrepresentative moves, and the exact kind of price behavior that looks like a setup but isn't real. Wait it out.
Why This Changes Everything Going Forward
Once bias, context, and narrative actually click, every lesson after this stops feeling like a list of separate patterns and starts feeling like one connected system:
Your Assignment: Chart Shading Discipline
Before your next session at the charts, do this: pick a higher timeframe, mark your bias, shade your context areas, and only then drop down to your entry timeframe. Don't take a single setup that doesn't match the color you shaded. That discipline alone will filter out more bad trades than any indicator ever will.